Google Drawings Portrait Art Activity
Saturday, October 19, 2024Everyone who knows me can attest to how much I love being a Core French teacher. I knew as young as 10 years old that I would become a French teacher and I still recall the thank you card I wrote to one of my elementary French teachers who inspired me to pursue my passion. A few years ago, I took a break from the classroom and joined the SIS Project to become a teacher-trainer. Once the term of my position ended, I ended up taking a position where I taught Core French for half of the day and French Specialty (French Immersion) for the other half, since there weren't any full-time Core French positions available in my area. Visual Arts was one of the French Immersion subjects I taught to grade 5, 6 and 8 students.
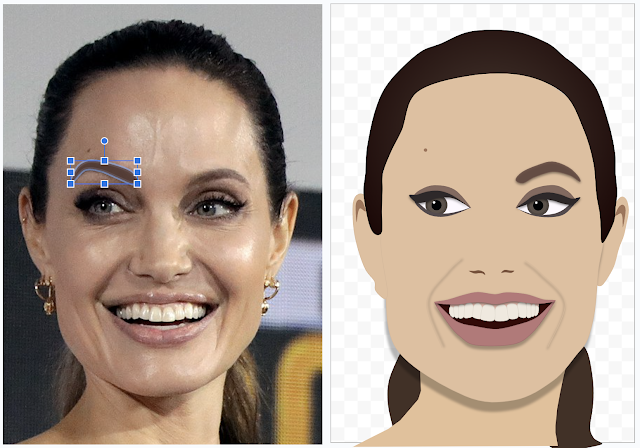
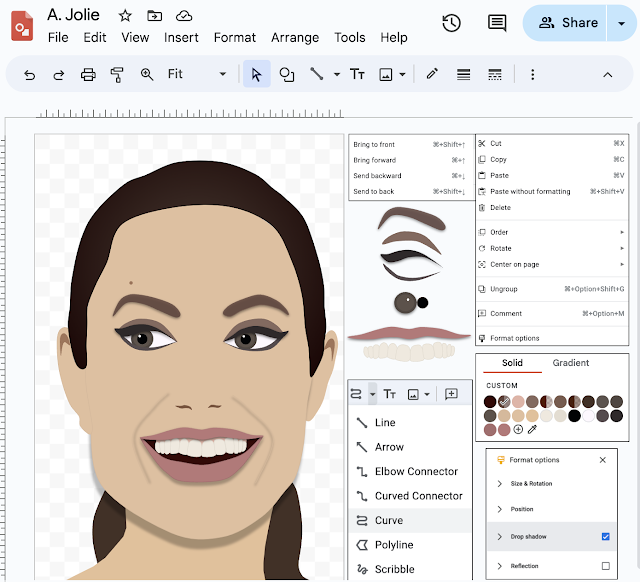
As much as I love art, I struggled to find ideas that worked within my schedule given the time constraints, especially seeing as I had to travel from class to class. Luckily, I knew of a number of digital art activities that I had come across over the years. One such activity was the use of Google Drawings to recreate portraits, which I had learned about at a 2016 Google Summit workshop with media specialist George Barcenas (check out slide 4 for an animated gif demo). He demonstrated how you can insert a photo onto one side of the Drawing canvas and trace over parts of the head and face using the curve line. The trick is clicking multiple times as you draw the line until you reach the starting point to close the shape. You can then right-click on the shape to edit any of the points (or double-click on it), format the colour of the line and shape fill/gradient, and even add a drop shadow.
Then move it to the other side of your canvas. Thinking in terms of layers, it is recommended that you begin with the head and hair since they will be the lowermost layers, and then draw the facial features, since every time you add a shape, it becomes the topmost layer. Or, you can simply right-click on the shape and click on Order to change the layer.
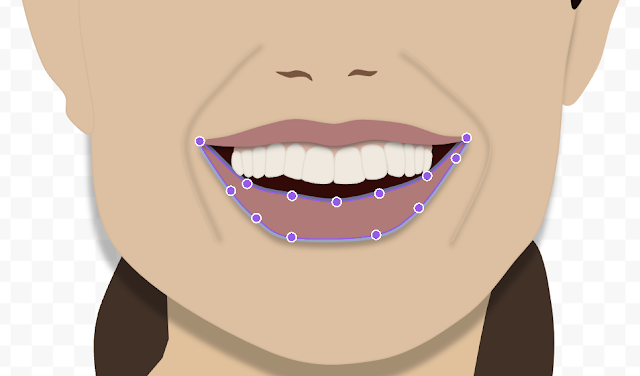
As you can see in the photo above, there are many different layers to the eyes and mouth but a tip I shared with my students was to choose a face that was somewhat symmetrical since, once they make one eye, they can duplicate it, right-click on it and select Rotate to flip it horizontally. This avoids having to start from scratch and they can always edit the points if need be. It's the same technique I used for the teeth. I created one tooth, duplicated it and adjusted the points. I used this activity in my grade 8 class and was truly impressed by their work!
Additional Tips:
- Use the eye dropper tool to create custom colours that match the original photo.
- Use a basic circle shape for the iris and pupil, layering them underneath the eyelids.
- Click on a shape to activate the Format Options menu (or right click on a shape) to add a drop shadow, which helps create a sense of depth, rotate a shape using precise degrees or to lock aspect ratio.


0 COMMENTS
Thanks for taking the time to leave a comment here on Toronto Teacher Mom. Hope you have a great day!